Saturday, April 7, 2012

Friday, April 6, 2012

Start, Stop, Restart Services in Fedora Automatically


Start, Stop, Restart Services in Fedora 14 (Laughlin) Automatically

fedora14-thumbThis brief tutorial will show you how to quickly stop, start or restart services in Fedora 14, codename Laughlin. If you have unnecessary services running in the background, then sooner or later your pc performance may suffer. Because the more services that are running the slower your computer becomes.

Getting started:

To get started, go to System –> Administration –> Add/Remove Software.

fedora_14_services

Then search for and install ‘system-config-services’. Click ‘Apply’ to install.
system-config-services
fedora_14_services_1

After installing, go to System –> Administration –> Services.

fedora_14_services_2

To enable a service to start automatically, select the service and click ‘Enable’

fedora_14_services_3

Clicking ‘Disable’ will disable the service from starting up automatically when your computer starts.
Stop, Start, and Restart will do just what their names said.

linux commands

gui mode ubuntu server
ubuntu_server#sudo apt-get install xinit

Thursday, April 5, 2012

here was a problem connecting to Microsoft Office Outlook. The email address used in your default Outlook profile is different from the sign-in address used in Lync 2010. Change your default Outlook profile to match the sign-in address you are using in Lync, and then sign out and sign back in to Lync.

Scenario 1: The email address that is used in your default Outlook profile differs from the sign-in address that is used in Lync 2010

Verify the user's primary SMTP address. Make sure that the Outlook profile that is created uses an email address that matches the Session Initiation Protocol (SIP) address. To do this, follow these steps:
  1. Open Control Panel, and then click Mail.
  2. Click E-mail Accounts. The email address that is listed should match the SIP address.
  3. If the listed email address does not match the SIP address, re-create the Outlook profile. When you re-create the Outlook profile, manually enter a matching SIP address.

Scenario 2: Outlook is not installed or configured correctly


Repair or reinstall Outlook, and then sign out and sign back in to Lync. To do this, follow these steps:
  1. Uninstall Lync 2010, and then repair the Microsoft Office installation.
  2. If repairing Office does not resolve the issue, perform a fresh installation of Lync 2010 and Office in the following order:
    1. Uninstall Office.
    2. Uninstall Lync 2010.
    3. Reinstall Office.
    4. Set up and configure an Outlook profile.
    5. Reinstall Lync 2010.
If the earlier steps do not resolve the issue, edit the registry. To do this, follow these steps:

  1. Click Start, click Run, type regedit, and then press Enter.
  2. Locate and then delete the following registry subkey:

    HKEY_CURRENT_USER\Software\Clients\Mail
  3. Locate the following subkey, and then make sure that Outlook is set as the default mail client:

    HKEY_LOCAL_MACHINE\Software\Clients\Mail
  4. Restart the computer.

Scenario 3: You receive the "Lync is in the process of determining the location of Exchange Web Services" or the "Lync cannot connect to the Exchange server. Lync will attempt to retry the connection" error message

These messages typically occur when you install Lync 2010, and they should disappear after several minutes. If one of these error messages persists or changes to another Outlook integration error, follow the steps in the scenario that is most appropriate for the error.

One of these errors may also occur when you enter incorrect credentials when you are prompted to connect to your Outlook profile or if you opt to click Cancel. To resolve the issue, sign out and then sign back in to Lync, and then enter your credentials. If your credentials are not accepted and you are continuously prompted for credentials, see the following article in the Microsoft Knowledge Base:  
2298541  Microsoft Lync 2010 continuously asks for credentials after signing in

Scenario 4: You cannot connect to Exchange Web Services (EWS) to retrieve Calendar and Out of Office information


Lync relies on EWS to retrieve information for Availability, for Free/Busy, for Out of Office, and for Contact Search. If the AutoDiscover service is not set up correctly, see the following Microsoft TechNet article:


You can follow these steps to verify that AutoDiscover for the user’s Exchange mailbox is working correctly:
  1. Verify that Exchange Free/Busy is working in Outlook. To do this, follow these steps:
    1. Start Outlook, and then create a new meeting invitation.
    2. Add several contacts to the invitee list. Then, click Scheduling Assistant and verify that you can see when people are available or busy.
  2. If the Free/Busy information for users is displayed as hashes (/////), it is likely that there is something wrong with the Exchange Free/Busy service. Verify the AutoDiscover service. To do this, follow these steps:
    1. Press and hold CTRL, right-click the Outlook icon in the notification area, and then click Test E-Mail AutoConfiguration.
    2. Enter the user’s SIP address and password. This verifies that Lync can determine your EWS endpoint based on your SIP address.
  3. Clean Outlook Free/Busy information. To do this, follow these steps:
    1. Open a command prompt. To do this, click Start, click Run, type cmd, and then press Enter.
    2. Move to the Outlook installation folder:
      • Office 2010: C:\Program Files\Microsoft Office\Office14
      • Office 2007: C:\Program Files\Microsoft Office\Office12
    3. Type "outlook.exe /cleanfreebusy", and then press Enter.
  4. Verify the Lync EWS external URL. To do this, follow these steps:
    1. Press and hold CTRL, right-click the Lync icon in the notification area, and then click Configuration Information.
    2. Enter the EWS External URL value into a web browser. If you are prompted, enter your Office 365 credentials. You should see the Exchange Web Services XML document displayed in the web browser.
  5. Add Exchange and Lync URLs to the Trusted sites list in Internet Explorer. To do this, follow these steps:
    1. Open Internet Explorer, and then click Internet Options on the Tools menu.
    2. Click the Security tab, click Trusted sites, and then click Sites.
    3. Add the following URLs to the list of trusted sites:
      • http://*.outlook.com
      • http://*.lync.com
      • http://*.sharepoint.com
      • Click Close, and then click OK.                               
      • http://support.microsoft.com/kb/2436962 

Tuesday, April 3, 2012

Integrating Exchange UM with Lync 2010

 
 http://www.lynclog.com/2011/04/integrating-exchange-um-with-lync-2010.html
 
Until now, my lab was under domain “drago.ws”. Recently I acquired “lynclog.com” and for the last two days I have been deploying another lab. From now on, our examples will be on this lab – still same topology, different domain.

Now that I have deployed Microsoft Exchange 2010 SP1, it is time to configure Unified Messaging role to work with Lync and further extend testing for voicemail, Subscriber Access, Auto attendant etc. As usual, when deploying new software and/or roles, I made sure the OS and product is fully patched and updated. Another habit of mine is to resolve all errors or warnings in the Windows Event log before attempt to integrate products and services. My previous experience thought me that something “innocent” that I postponed for resolving later sometimes lead to major problem else seems unrelated…

On my UM server, first I made sure TLS is enabled. Fact is – I could not install certificate on the UM server unless TLS or Dial is enabled.


Because TLS support was turned ON, our UM server needs a certificate, else the service will not start. This certificate must be from Trusted Root CA and since UM is internal service only, a certificate form our Domain CA will be sufficient.

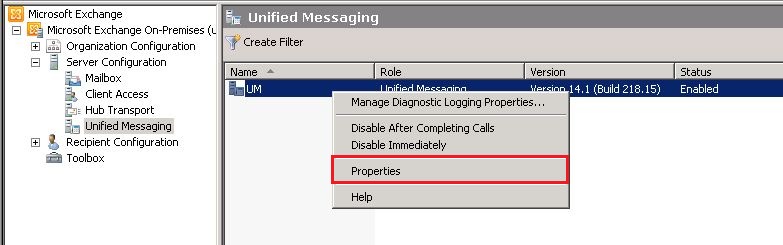
In EMC, server node, click on your UM server and proceed further


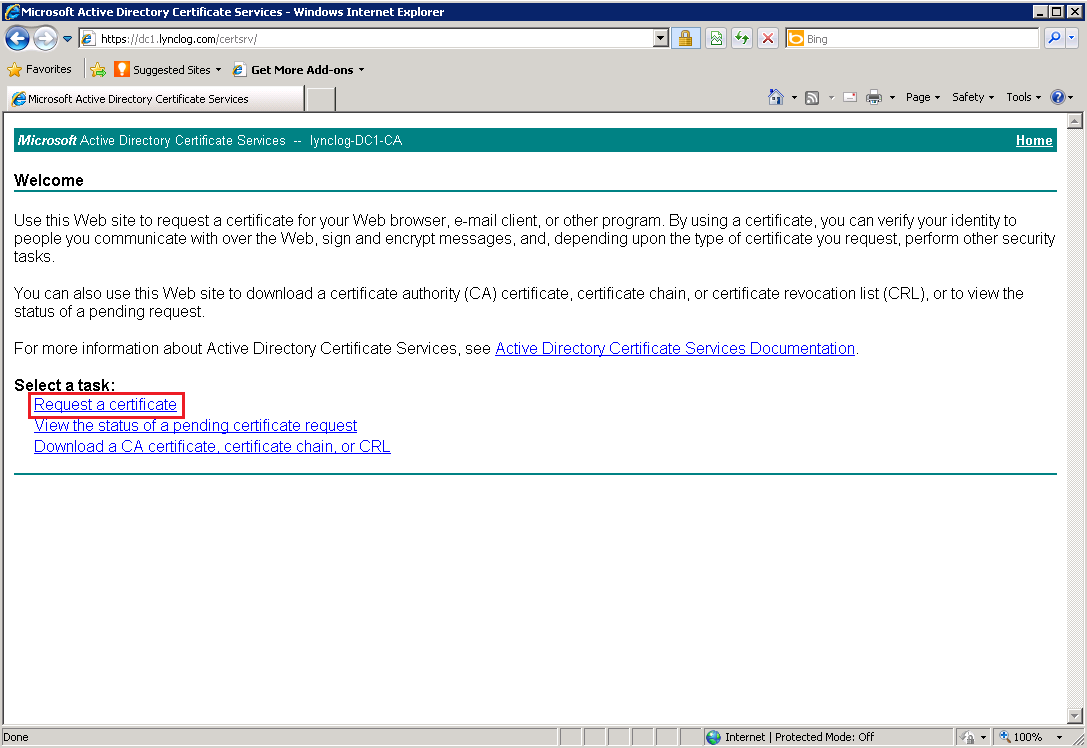
I just created offline certificate request. Now I will go to my Domain Certificate Services we site and process the request.


Here I need to open my request (c:\um.req) with notepad and copy the content. It is very important to copy the text exactly as it is. I always use STRL + A to make sure only the necessary text was copied.

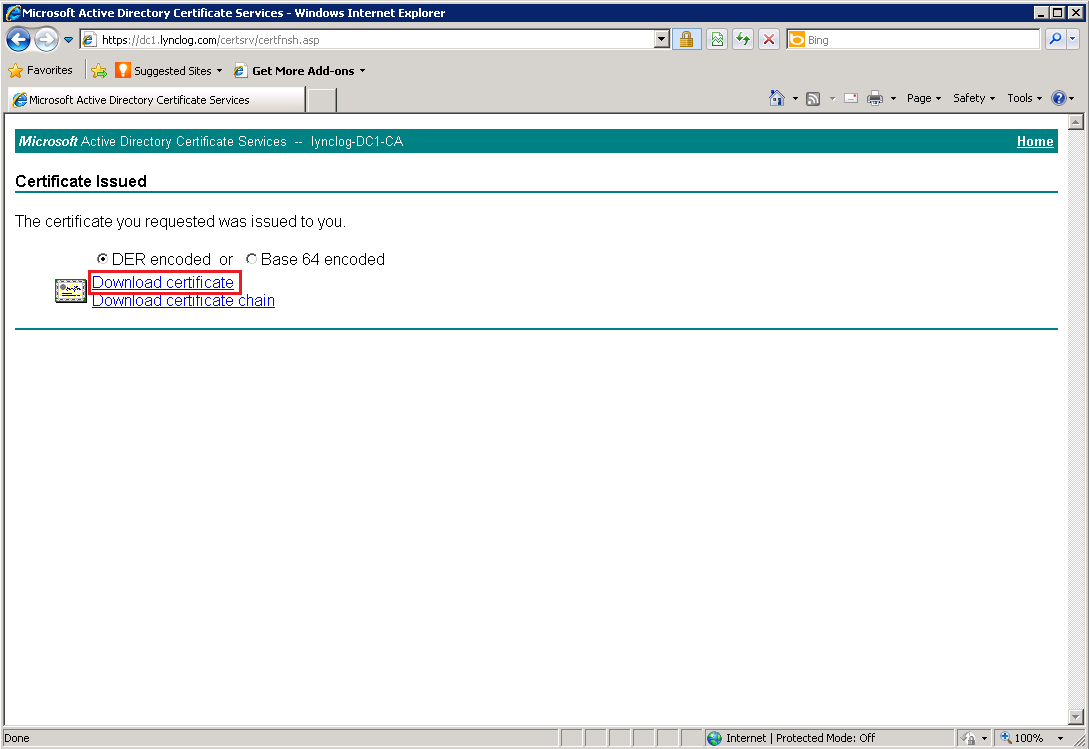
…paste the text in the request page and submit the request.


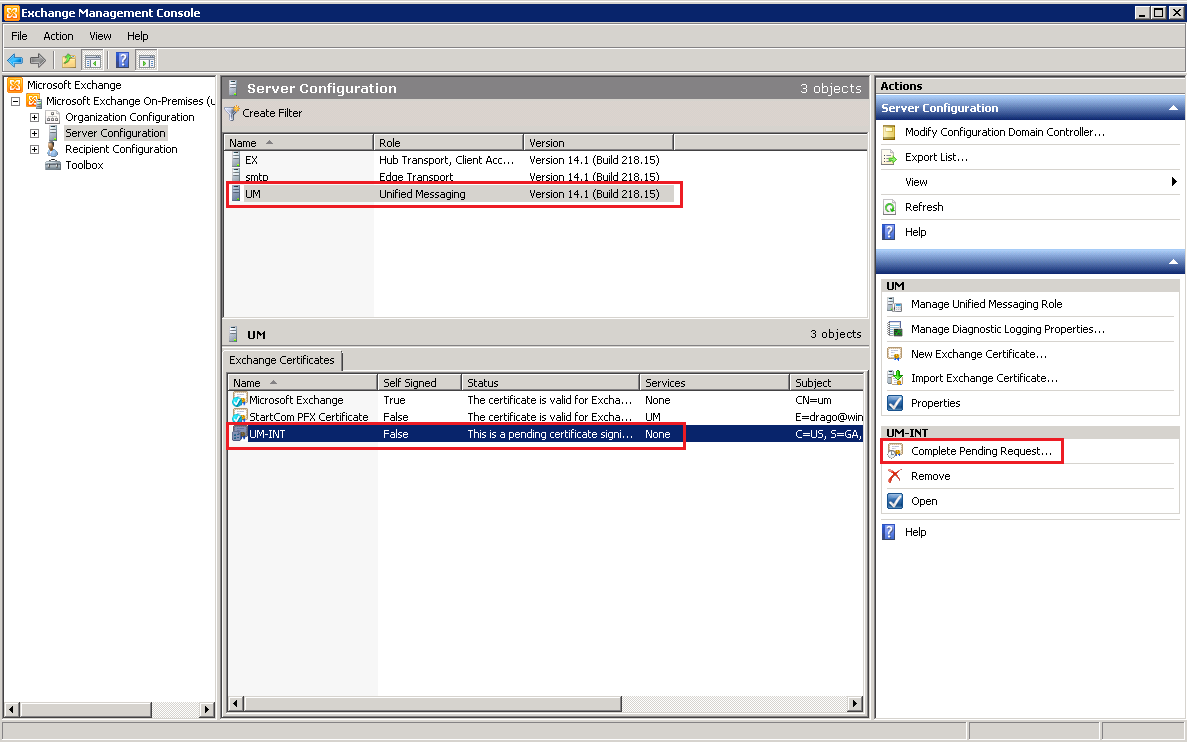
Next step is to complete the pending request. Click on the request to see “Complete Pending Request” option…


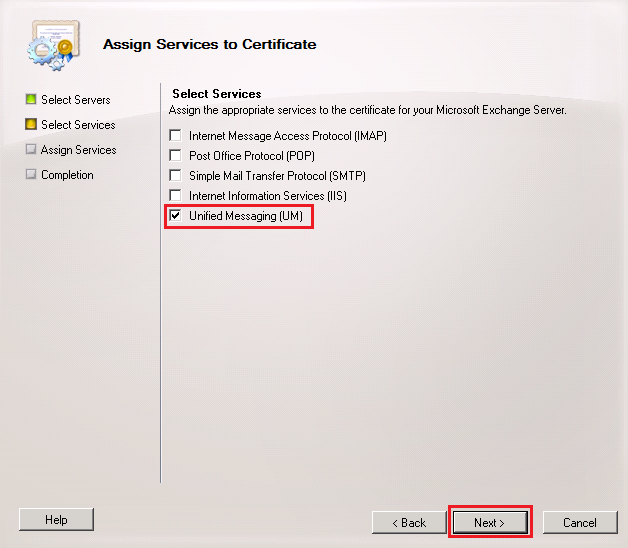
…and now I see the certificate as Valid. However, I must assign service(s) to it.


At the end, I have a valid certificate assigned to UM server. Reboot and let’s move further.


Next, I will create UM dial plan.


My dial plan is not completed yet. I still must create Subscriber access number and so other customization.


***Note that here I used two numbers - +14785550001 which is full US E.164 number and “+0099” which, because has “+” on front, is still considered E.164. I want to see if this number can be utilized later somehow.


***ALERT***ALERT***ALERT***

Apparently there are some changes introduced with SP1. Make sure you follow the next steps or your Auto Attendant will not be able to transfer to extensions.


***You must apply at his point.


 Next, I will customize my UM Mailbox Policy created automatically when the Dial plan was enabled. Since this is lab, I will change the Minimum PIN Policy to 4 digits and remove the PIN expiration.


…and leave the rest to default settings.


Lastly, Auto Attendant. Frankly, with the introduction of RGS, I rarely use AA except in one case (the Main college number, where the caller has an option to dial by extension or name).


…and customize it.


Let’s move to our front end server and execute “C:\Program Files\Common Files\Microsoft Lync Server 2010\Support\OcsUmUtil.exe” from Command Prompt.


Oops. I forgot to change the Name of the contact object.


Move back to the UM server. In Exchange Management Shell, navigate to C:\Program Files\Microsoft\Exchange Server\V14\Scripts and execute .\ExchUCUtil.ps1